

This question comes up a lot, and sadly often after it’s too late. This is what commonly happens: you choose beautiful tiles, your tiler installs them, and you come back later to find he has put a horrible chrome trim across them! I want to help you avoid this, so if you are doing any kind of tiling, read on.
What am I talking about?
Where two tiles come together at an external corner, this edge needs to be resolved somehow. Imagine the front edge of a bath, a tiled step, a window sill, or a shower niche – this is the edge we’re talking about. There are two main ways to resolve tiled edges: mitre the edges or use trims.
Mitred edges
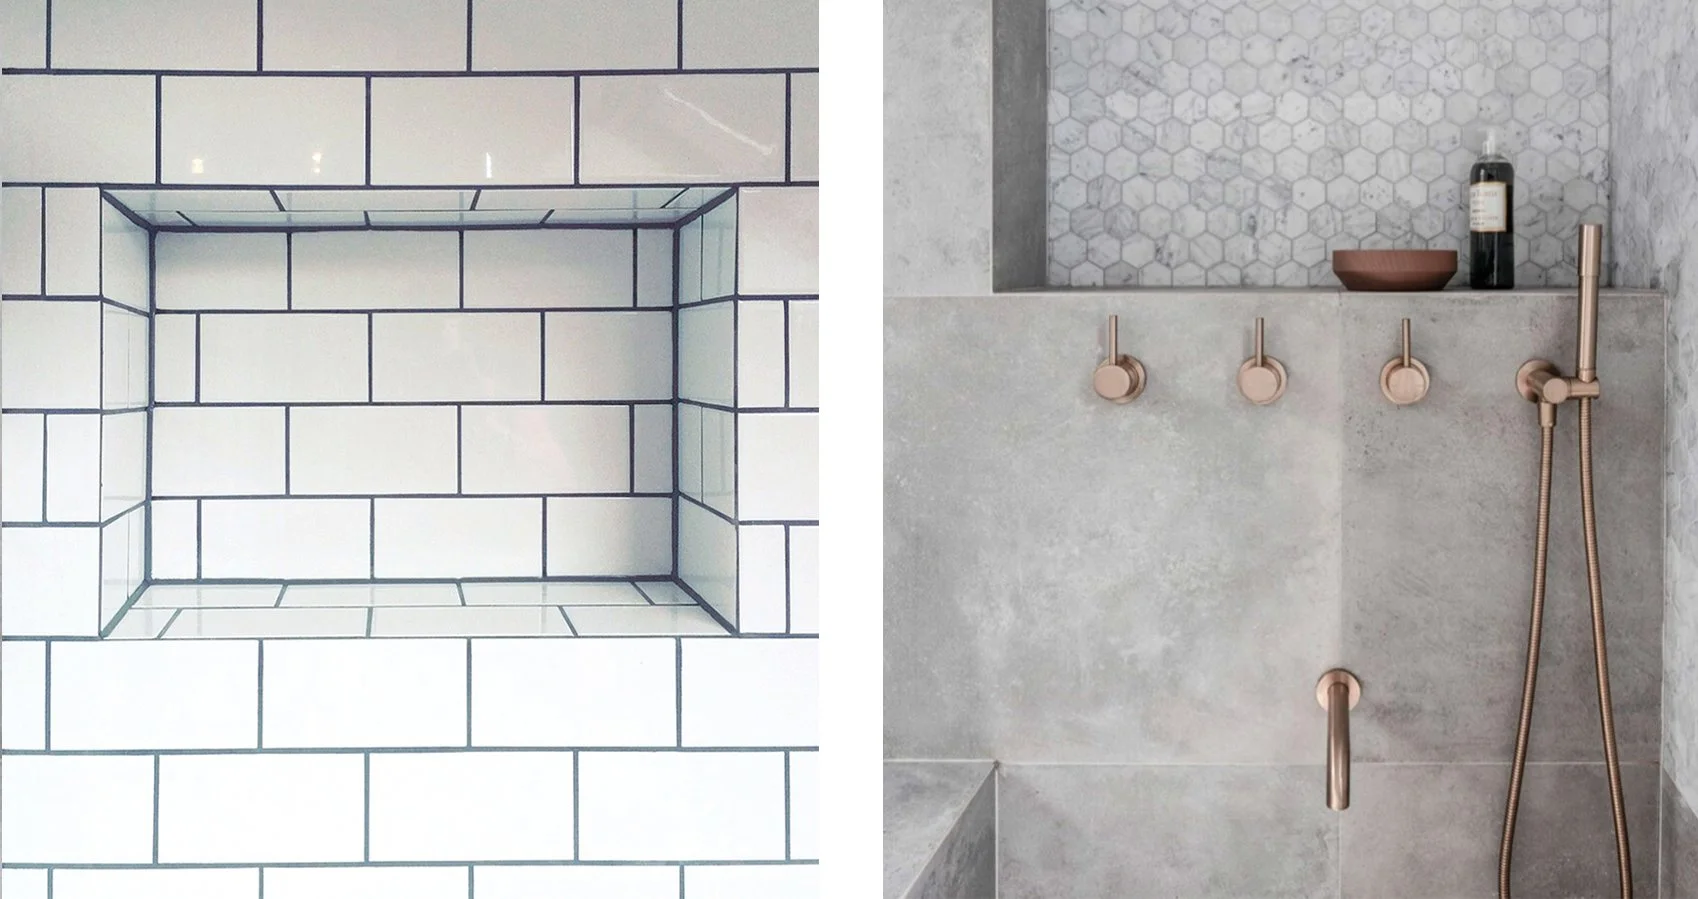
Shower niches showing mitres at the front edges
This is where both tiles are cut at a 45 degree angle so they so they meet together neatly in a right-angle. The edge then has a thin join that looks similar to the other lines of grout.
I love mitred edges and they are always my first choice. They are stylish, minimal and luxurious. They don’t distract from the tiles themselves. Any good tiler can do mitred edges, but it’s a bit harder and takes a bit longer, so it’s usually an extra they charge for.
The problem is, many tilers want the easy way out, especially when they are under the pump to finish a job quickly. Which means they often prefer to install trims instead of mitred edges. You might have to be firm to get your mitred edges. Which is why it’s really helpful if you discuss it at the quoting stage, before the job actually starts.
The down side of mitred edges is, because the tile is cut quite thin, it is more prone to chipping. Chipping isn’t such a big issue in something like a shower niche, but it is more likely an issue if you are tiling stairs. So think about your application and the pros and cons.
Another issue that can come up – if your tiler is not experienced at mitred edges, or reluctant to do them, they might end up being done poorly and look messy. Worse still, they could have a gap that allows water in. So look for an experienced tiler who is happy to do mitred edges. A good tiler will be proud to show you images of their previous work.
Using Trims
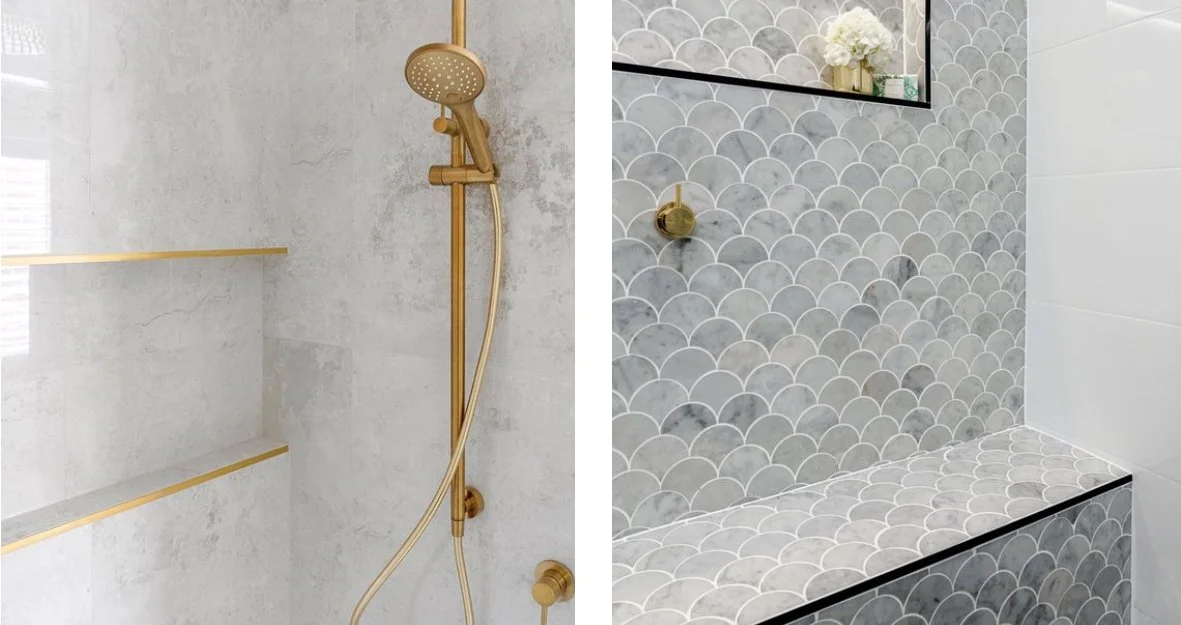
Shower tiles with trims on the front edges
If mitred edges are not in your budget, that’s okay. The other options is using trims, sometimes called ‘strip edging’. This is where a strip of plastic or metal is applied to the tile edge to cover it. Trims are available in lots of different colours, styles and thicknesses. Some people make a feature of them by choosing a contrasting colour. Or you can try and match it to your tiles so it isn’t as noticeable.
Often tilers will use standard chrome trims by default, but these aren’t very attractive, so make sure you think ahead and communicate what you really want. And always ask to see a sample of the trim the tiler is thinking of using.
Trims do create a stronger edge and prevent chipping, but remember the trim can get damaged too. It won’t chip like a tile, but when banged and dinged a lot it could look worse than a few tile chips. Especially if you get powder coated trims, because over time, the power coat might start to chip off. This is particularly relevant for stairs, which take more of a beating than say a shower shelf.
The big downside is trims don’t look nearly as refined or stylish as mitred edges.
Conclusion
I much prefer mitred edges for a better aesthetic. Your tiler might try and convince you not to have mitred, telling you trims will prevent chipping, but I think a few chips here and there still look better than trims.
Mitred edging will cost you more, so if you don’t have the budget, that’s okay. But do think about your trims, don’t just settle for standard chrome ones.
And talk to your tiler/builder early, during the quoting phase of the job, so everyone knows what is expected.

